5 simple steps for converting Markdown documents into HTML and adding Python syntax highlighting
In this little tutorial, I want to show you in 5 simple steps how easy it is to add code syntax highlighting to your blog articles.
There are more sophisticated approaches using static site generators, e.g., nikola, but the focus here is to give you the brief introduction of how it generally works.
All the files I will be using as examples in this tutorial can be download from the GitHub repository /rasbt/python_reference/tutorials/markdown_syntax_highlighting
Update:
The people at Webucator (a provider of Python training classes) created a nice video tutorial from this blog post that nicely explains all the essential steps in less than 4 minutes! Check it out on YouTube:
1 - Installing packages
The two packages that we will use are
Just as the name suggests, Python-Markdown is the Python package that we
will use for the Markdown to HTML conversion. The second library,
Pygments, will be used to add the syntax highlighting to the code
blocks.
Conveniently, both libraries can be installed via pip:
pip install markdown
and
pip install Pygments
(For alternative ways to install the Python-Markdown package, please see the documentation)
2 - Writing a Markdown document
Now, let us compose a simple Markdown document including some Python code blocks in any/our favorite Markdown editor.
##This is a test

Code blocks must be indented by 4 whitespaces.
Python-Markdown has a auto-guess function which works
pretty well:

    print("Hello, World")
    # some comment
    for letter in "this is a test":
        print(letter)

In cases where Python-Markdown has problems figuring out which
programming language we use, we can also add the language-tag
explicitly. One way to do this would be:


    :::python
    print("Hello, World")

or we can highlight certain lines to
draw the reader's attention:


    :::python hl_lines="1 5"
    print("highlight me!")
    # but not me!
    for letter in "this is a test":
    print(letter)
    # I want to be highlighted, too!
Note that the syntax highlighting does not only work for Python, but other programming languages.
So in the case of C++, for example:
:::c++
#include <iostream>

int main()
{
    std::cout << "Hello, world!" << std::endl;
   return 0;
}
Since the CodeHilite extension in Python-Markdown uses Pygments, every programming language that is listed here currently has support for syntax highlighting.
3 - Converting the Markdown document to HTML
After we created our Markdown document, we are going to use Python-Markdown directly from the command line to convert it into an HTML document.
Note that we can also import Python-Markdown as a module in our Python scripts, and it comes with a rich repertory of different functions, which are listed in the library reference.
The basic command line usage to convert a Markdown document into HTML would be:
python -m markdown input.md > output.html
However, since we want to have syntax highlighting for our Python code,
we will use Python-Markdown’s CodeHilite
extension
by providing an additional -x codehilite argument on the command line:
python -m markdown -x codehilite some_markdown.md > body.html
This will create the HTML body with our Markdown code converted to HTML with the Python code blocks annotated for the syntax highlighting.
4 - Generating the CSS
If we open the body.html file now, which we have created in the previous section, we will notice that it doesn’t have the Python code colored yet.
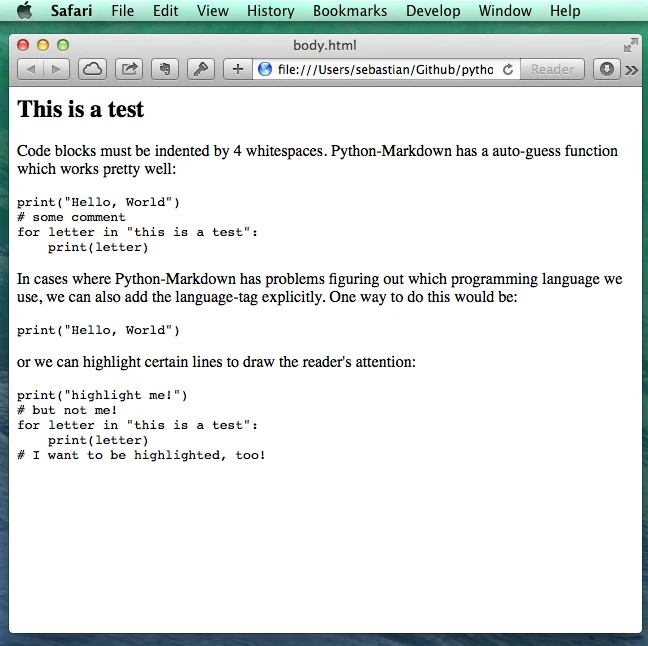
What is missing is the CSS code for adding the colors to our annotated
Python code block. But we can simply create such a CSS file via
Pygments from the command line.
pygmentize -S default -f html > codehilite.css
Note that we usually only need to create the codehilite.css file once and insert a link in all our HTML files that we created via Python-Markdown to get the syntax coloring
5 - Insert into your HTML body
In order to include a link to the codehilite.css file for syntax coloring in our converted HTML file, we have to add the following line to the header section.
<link rel="stylesheet" type="text/css" href="./codehilite.css">
Now, we can insert the HTML body (body.html), which was created from our Markdown document, directly into our final HTML file (e.g., our blog article template).
<!DOCTYPE html>
<html lang="en">

<head>
<meta charset="utf-8">
<link rel="stylesheet" type="text/css" href="./codehilite.css">
</head>

<body>

<-- converted HTML contents go here

</body>
</html>
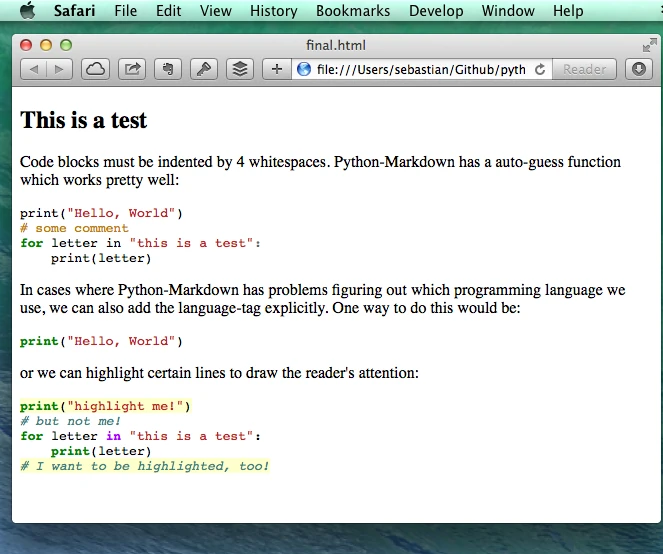
If we open our final.html file in our web browser now, we can the pretty Python syntax highlighting.
Useful links:
Read Next
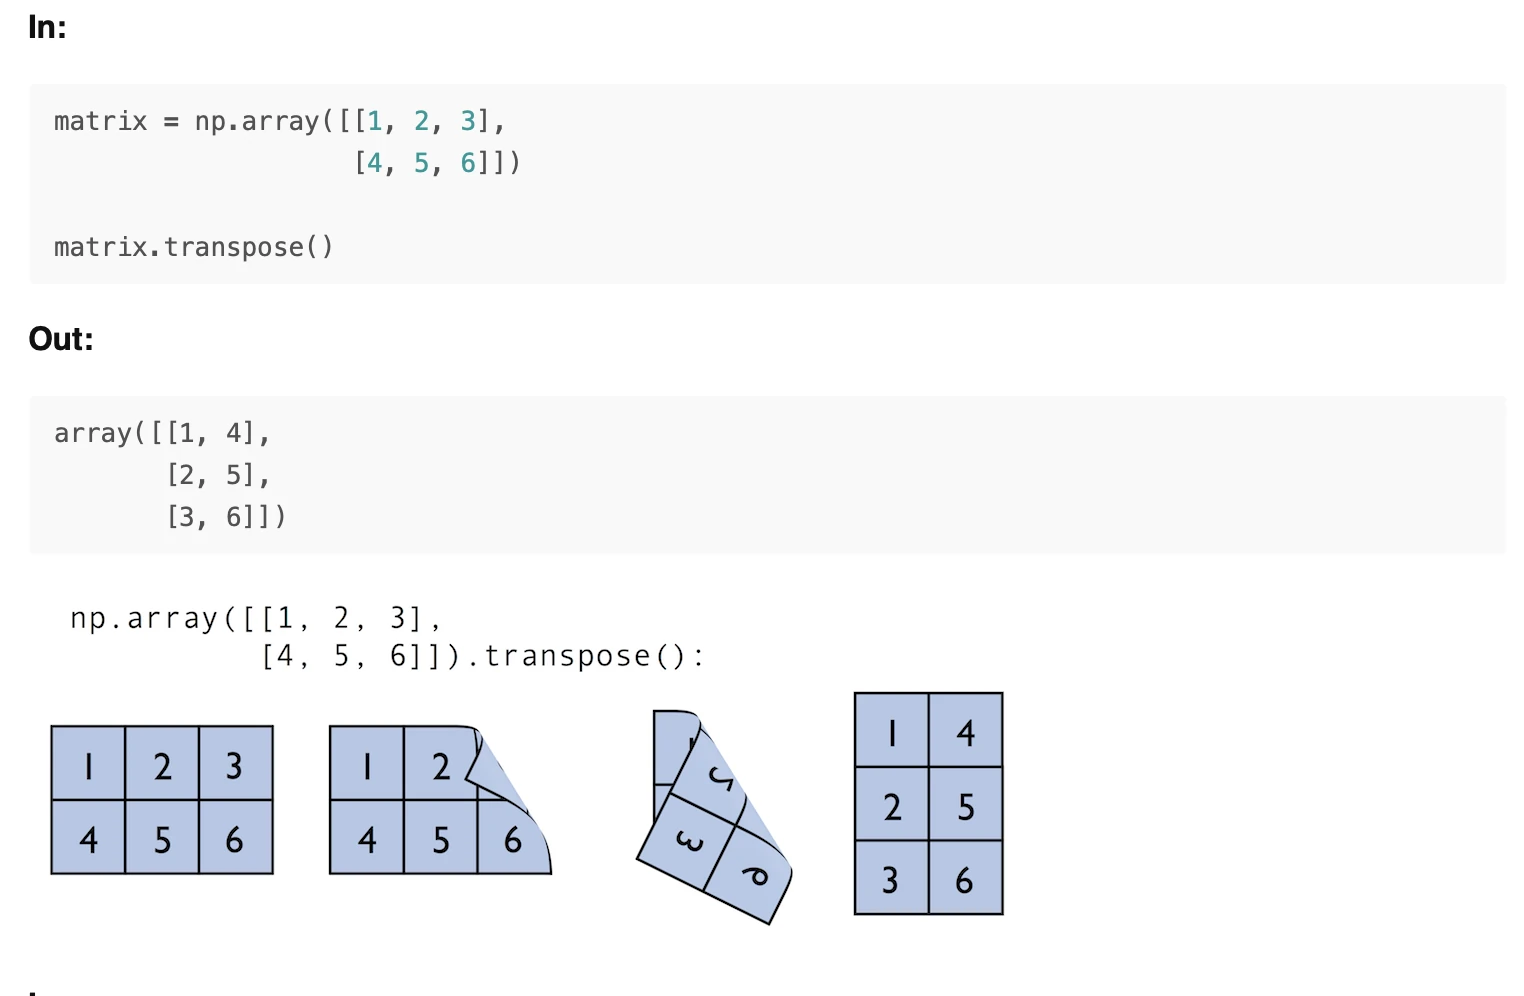 Scientific Computing in Python: Introduction to NumPy and Matplotlib
Beginner's guide to NumPy and Matplotlib for scientific computing: arrays, indexing, broadcasting, linear algebra, and plotting with Python code examples.
Scientific Computing in Python: Introduction to NumPy and Matplotlib
Beginner's guide to NumPy and Matplotlib for scientific computing: arrays, indexing, broadcasting, linear algebra, and plotting with Python code examples.
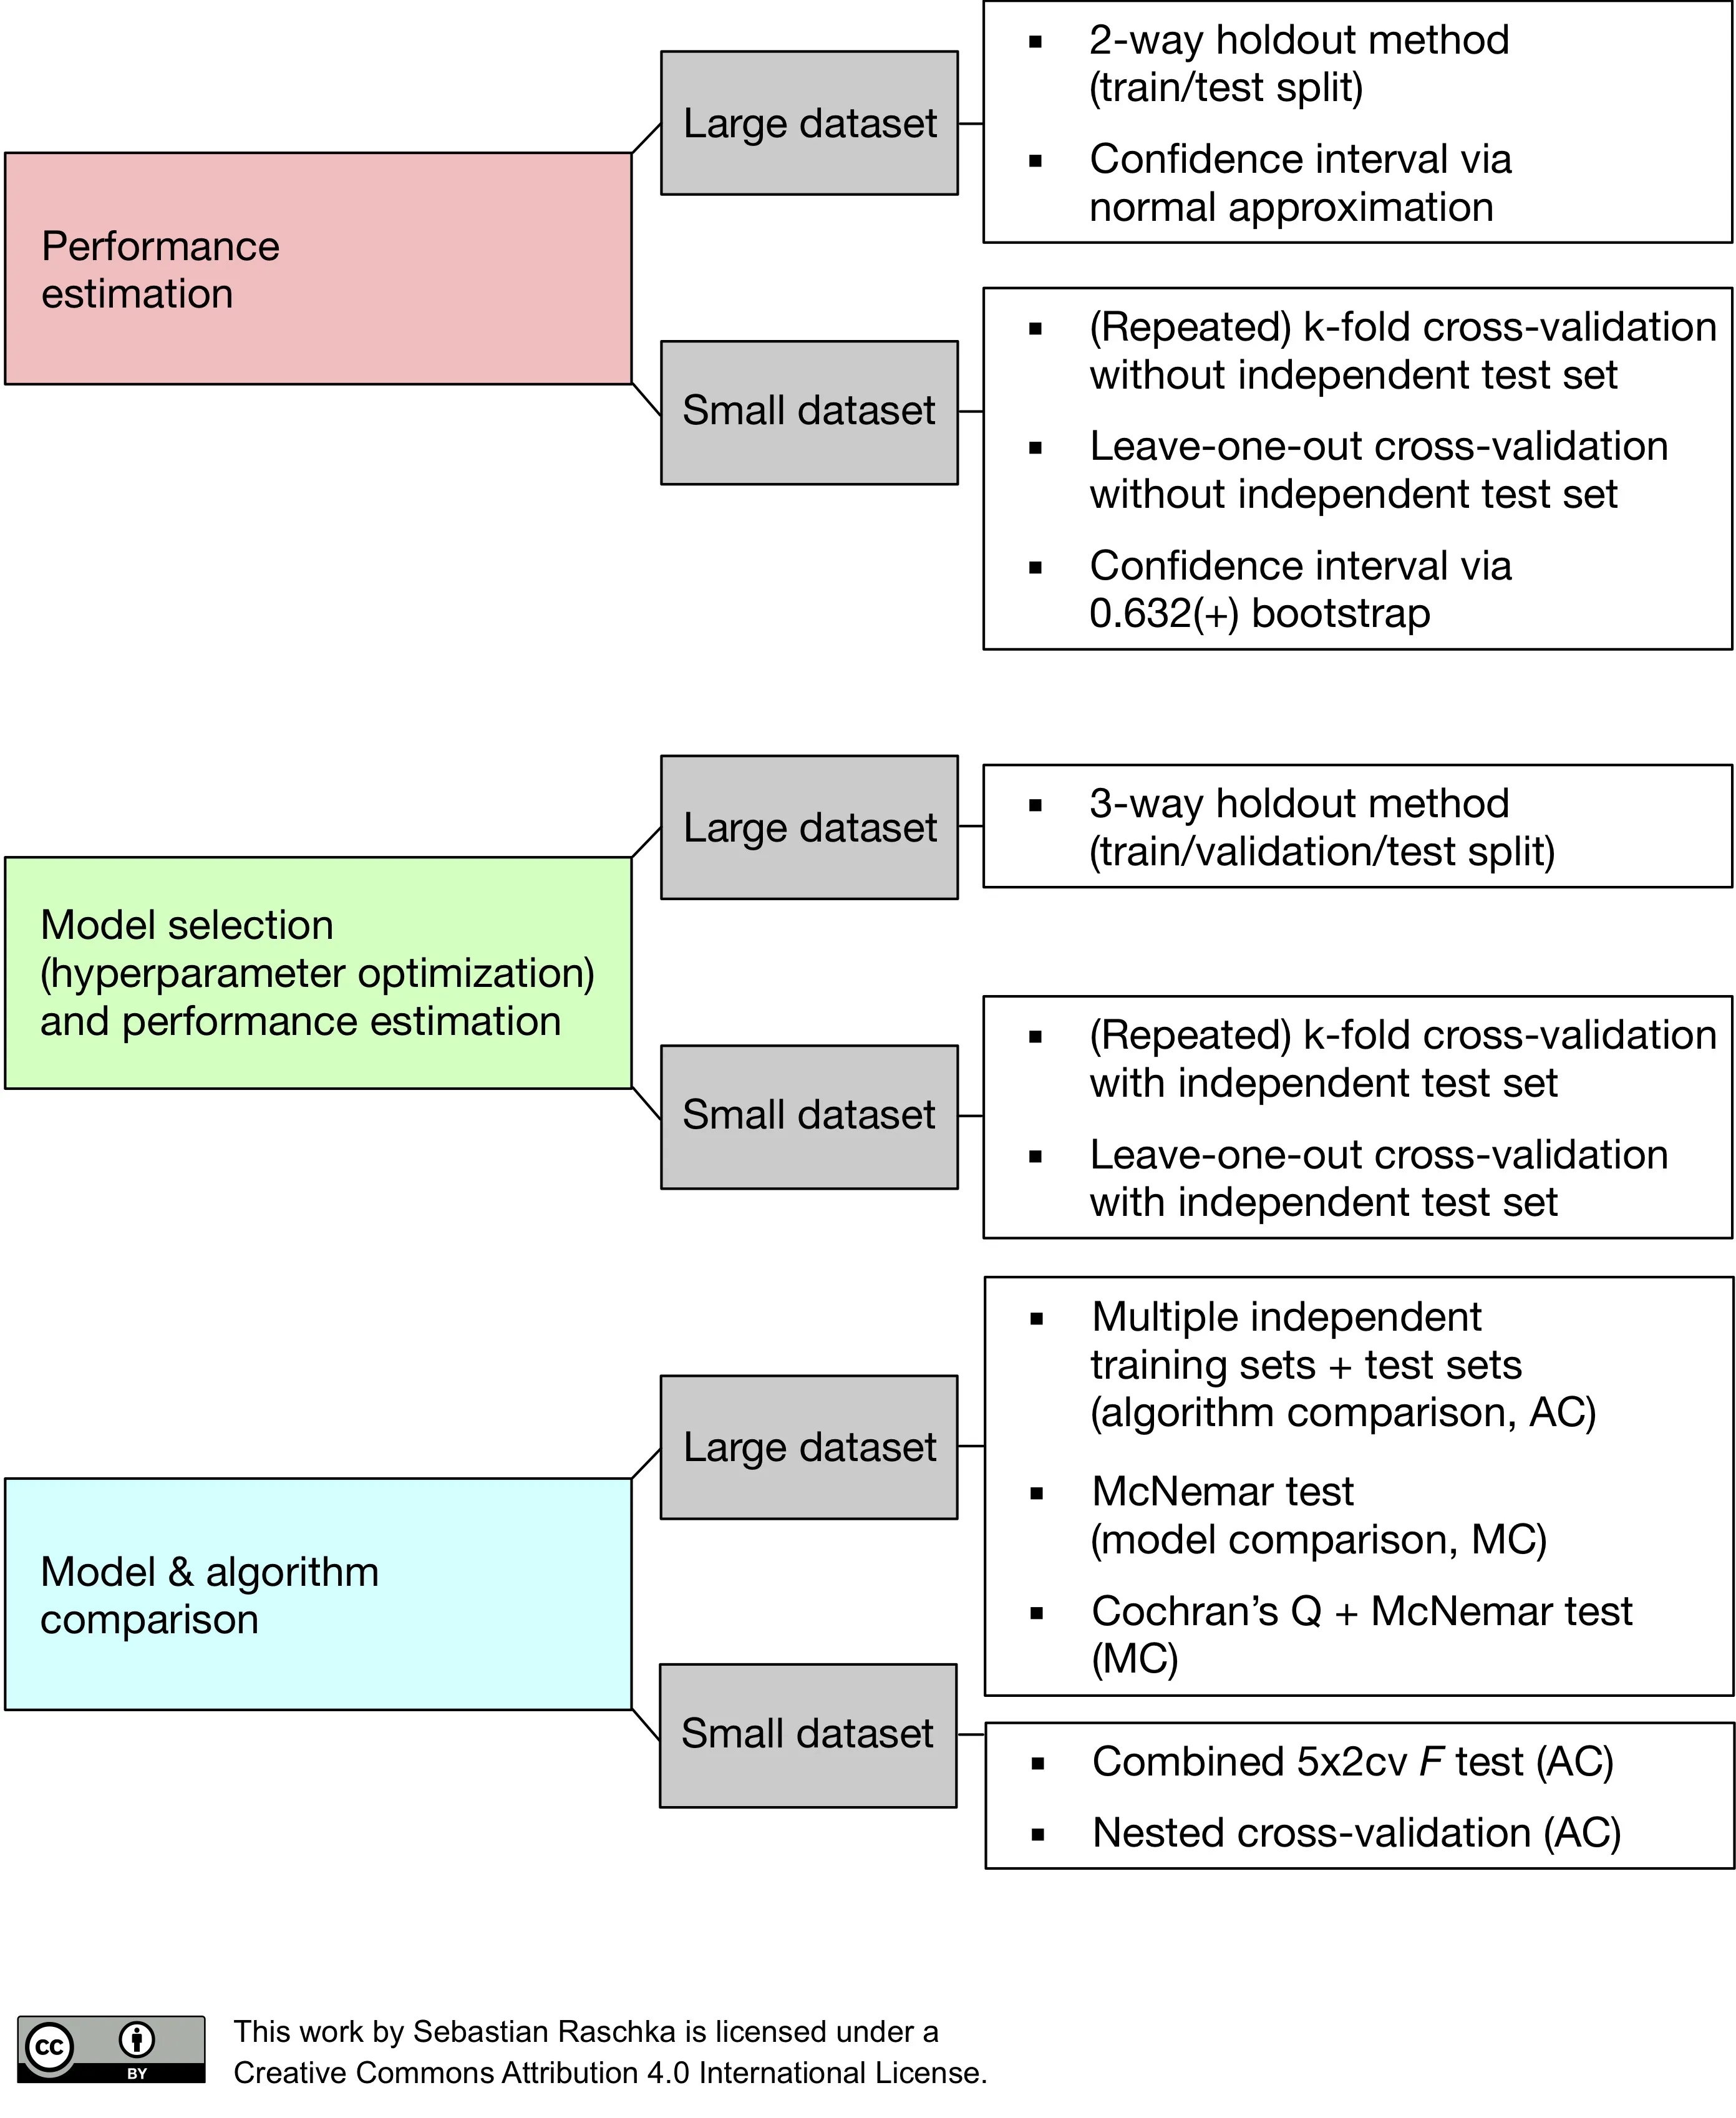 Model evaluation, model selection, and algorithm selection in machine learning
Part 4 of the model evaluation series explaining statistical tests, algorithm comparisons, corrected resampled tests, and nested cross-validation.
Model evaluation, model selection, and algorithm selection in machine learning
Part 4 of the model evaluation series explaining statistical tests, algorithm comparisons, corrected resampled tests, and nested cross-validation.
 Generating Gender-Neutral Face Images with Semi-Adversarial Neural Networks to Enhance Privacy
I thought that it would be nice to have short and concise summaries of recent projects handy, to share them with a more general audience, including...
Generating Gender-Neutral Face Images with Semi-Adversarial Neural Networks to Enhance Privacy
I thought that it would be nice to have short and concise summaries of recent projects handy, to share them with a more general audience, including...

If you read the book and have a few minutes to spare, I'd really appreciate a brief review. It helps us authors a lot!
Your support means a great deal! Thank you!